Setup PMA Voice
After the voice server is created, the next step is to apply it to server.cfg. This external configuration also works to hide the server's real IP and port from clients.
BEFORE YOU START
Prepare the Connection (IP:PORT) from the voice server card in the CFX → Voice Server menu.
1. Apply It to server.cfg
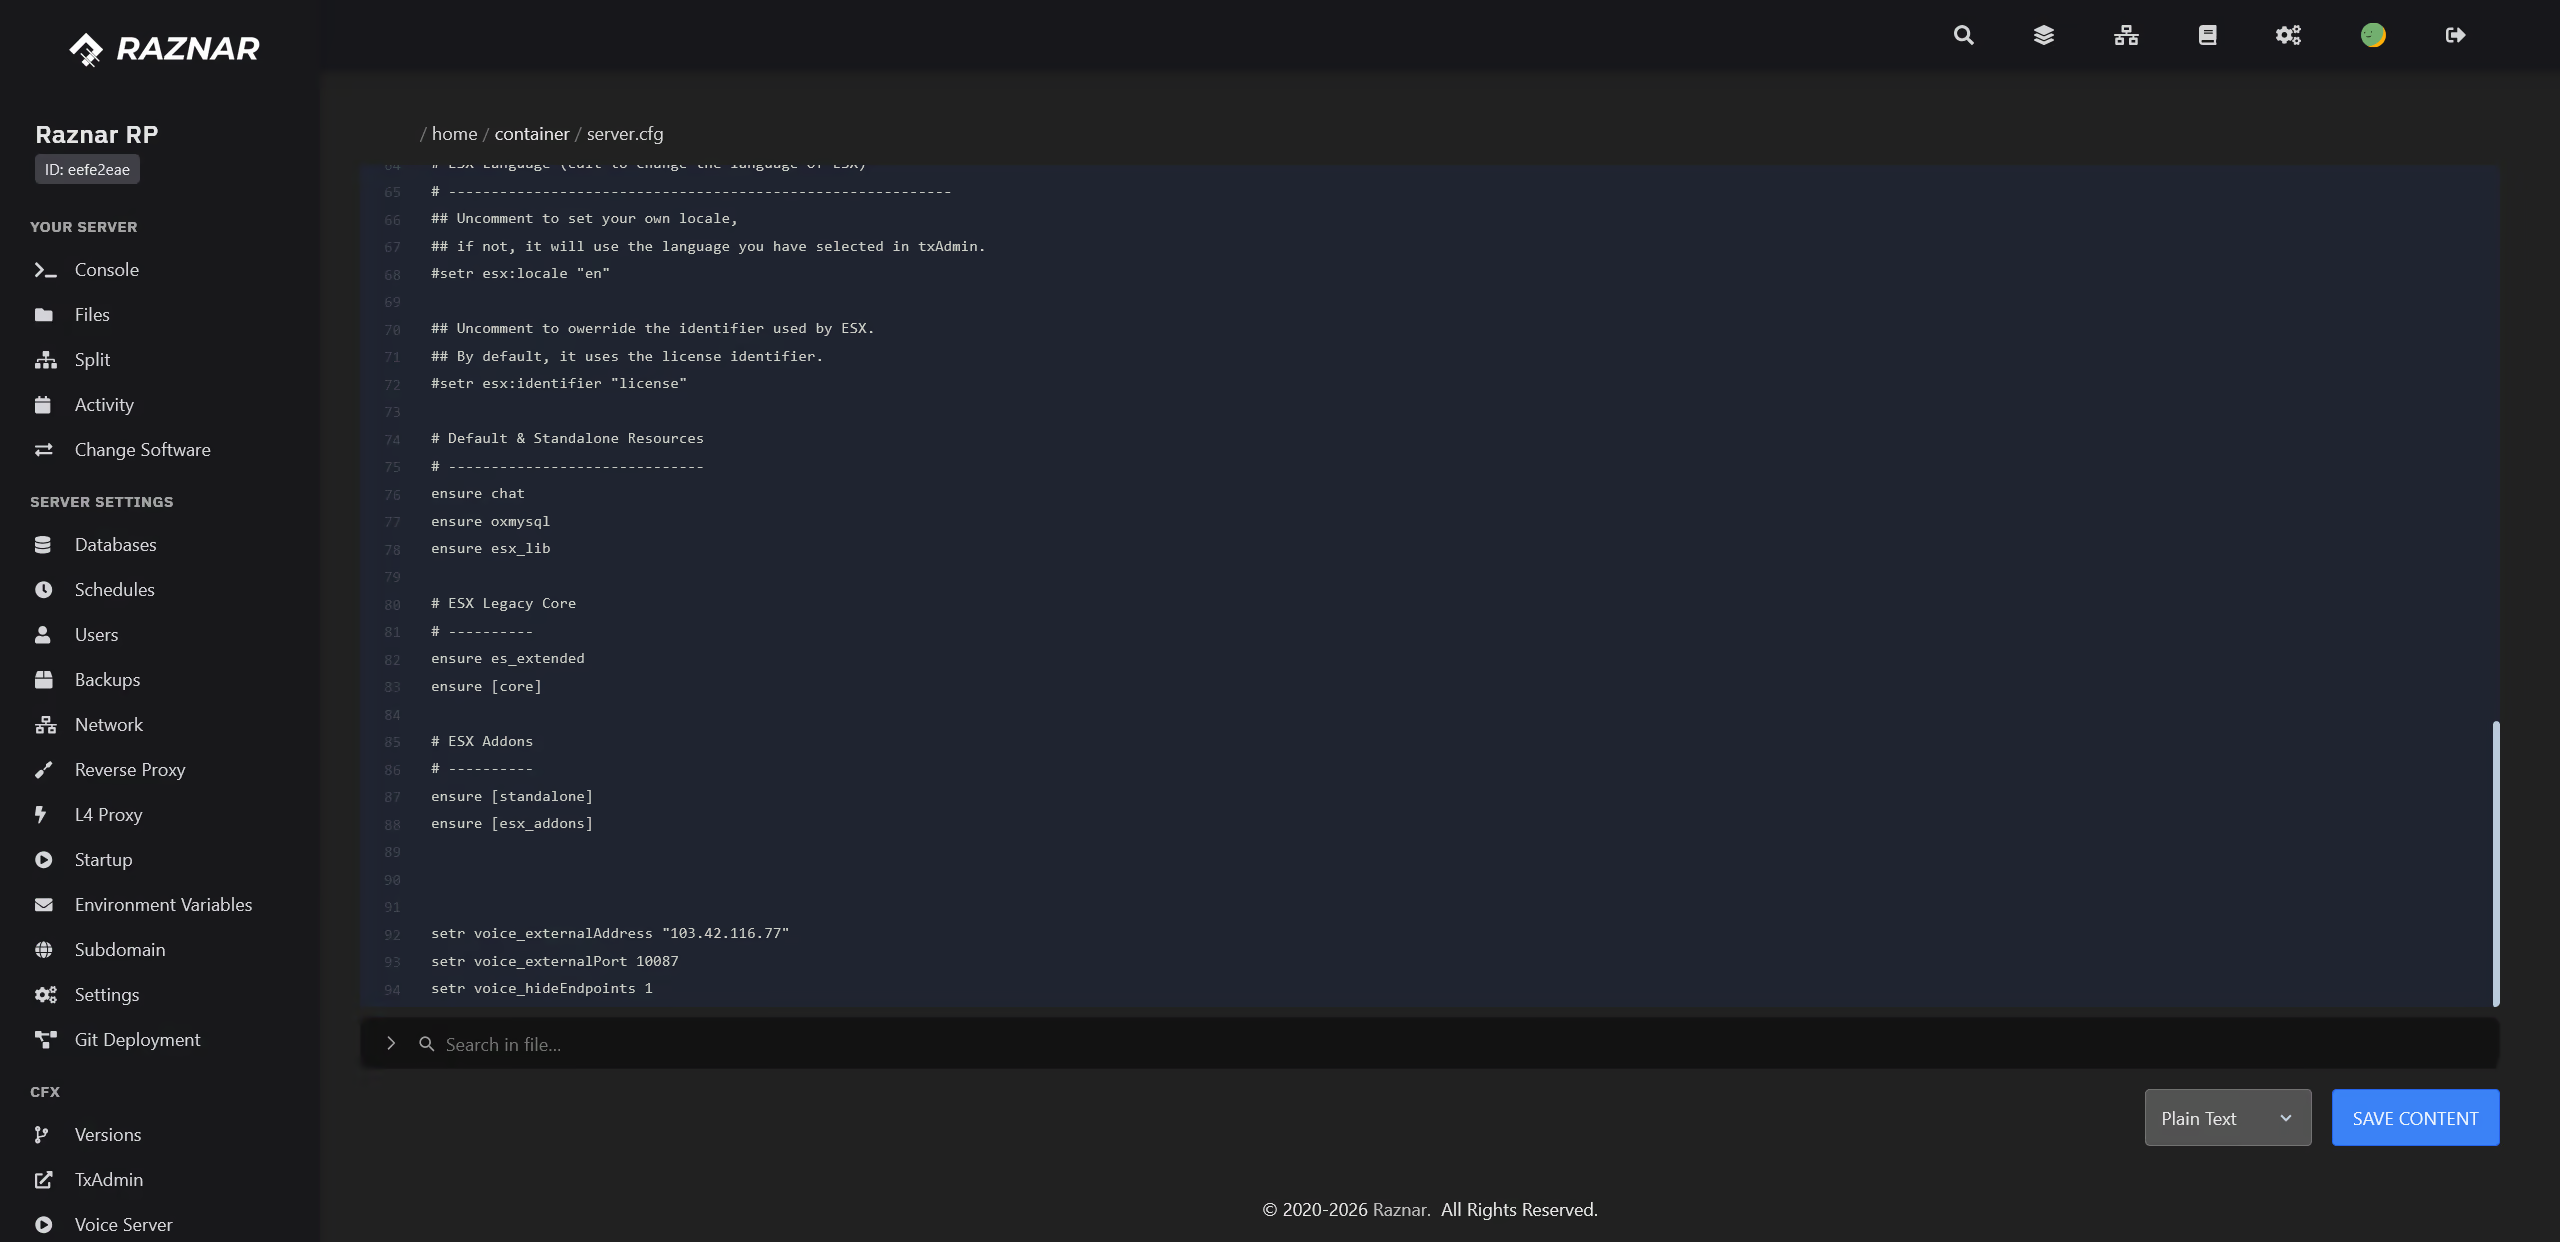
- Open the Files menu, then open the
server.cfgfile. - Add the following lines:
setr voice_externalAddress "103.xx.203.113"
setr voice_externalPort 30125
setr voice_hideEndpoints 1
🔧 Replace:
103.xx.203.113→ the IP from your voice server's Connection.30125→ the port from your voice server's Connection.
- Click Save Content.
2. Restart the Server
- Open the Console menu.
- Click Restart.
- Check the log in the console. If successful, the voice server will be active (bound) on the port you configured.
note
Make sure the pma-voice (or voice) resource already exists in the resources folder and is ensured in server.cfg. If not, players won't be able to use voice chat.
tip
Always use the Connection shown in the panel, because the voice server's address and port can differ for each instance.