How to Setup a Cache Proxy (Hosting)
After the cache proxy is created in the Game Panel (see How to Create a Cache Proxy (Hosting)), apply its hostname & CDN key to server.cfg.
1. Copy the Snippet from the Game Panel
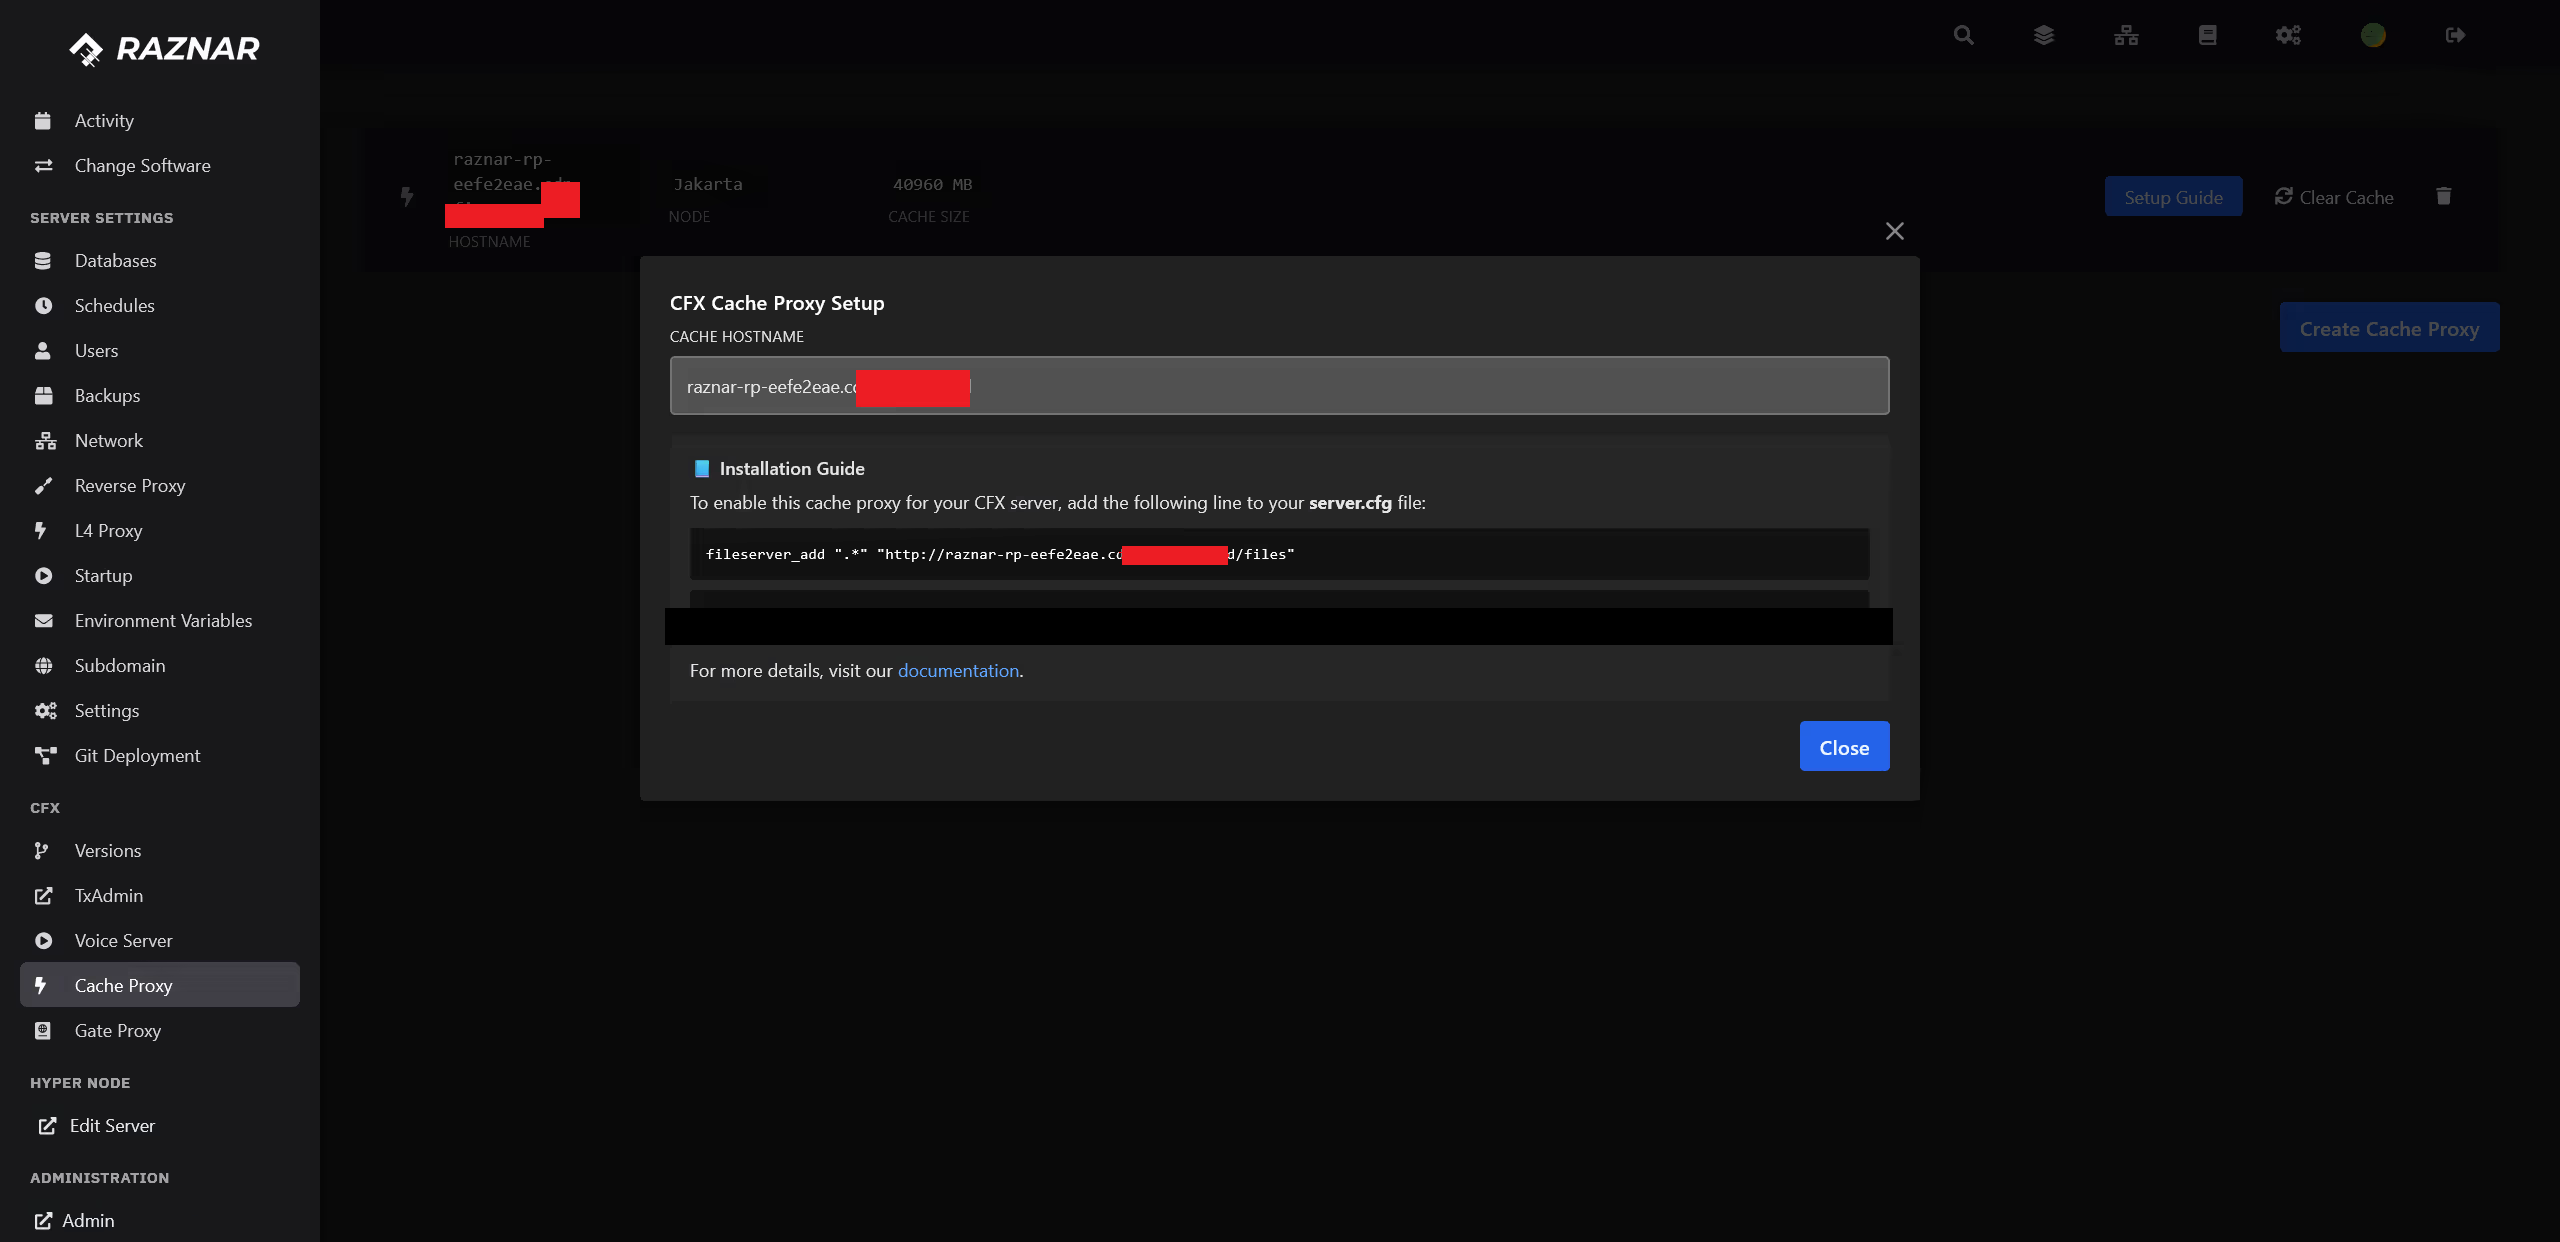
- Open the CFX → Cache Proxy menu.
- On the cache proxy row, click the Setup Guide button.
- Copy the Cache Hostname and the displayed
server.cfgsnippet.
2. Apply It to server.cfg
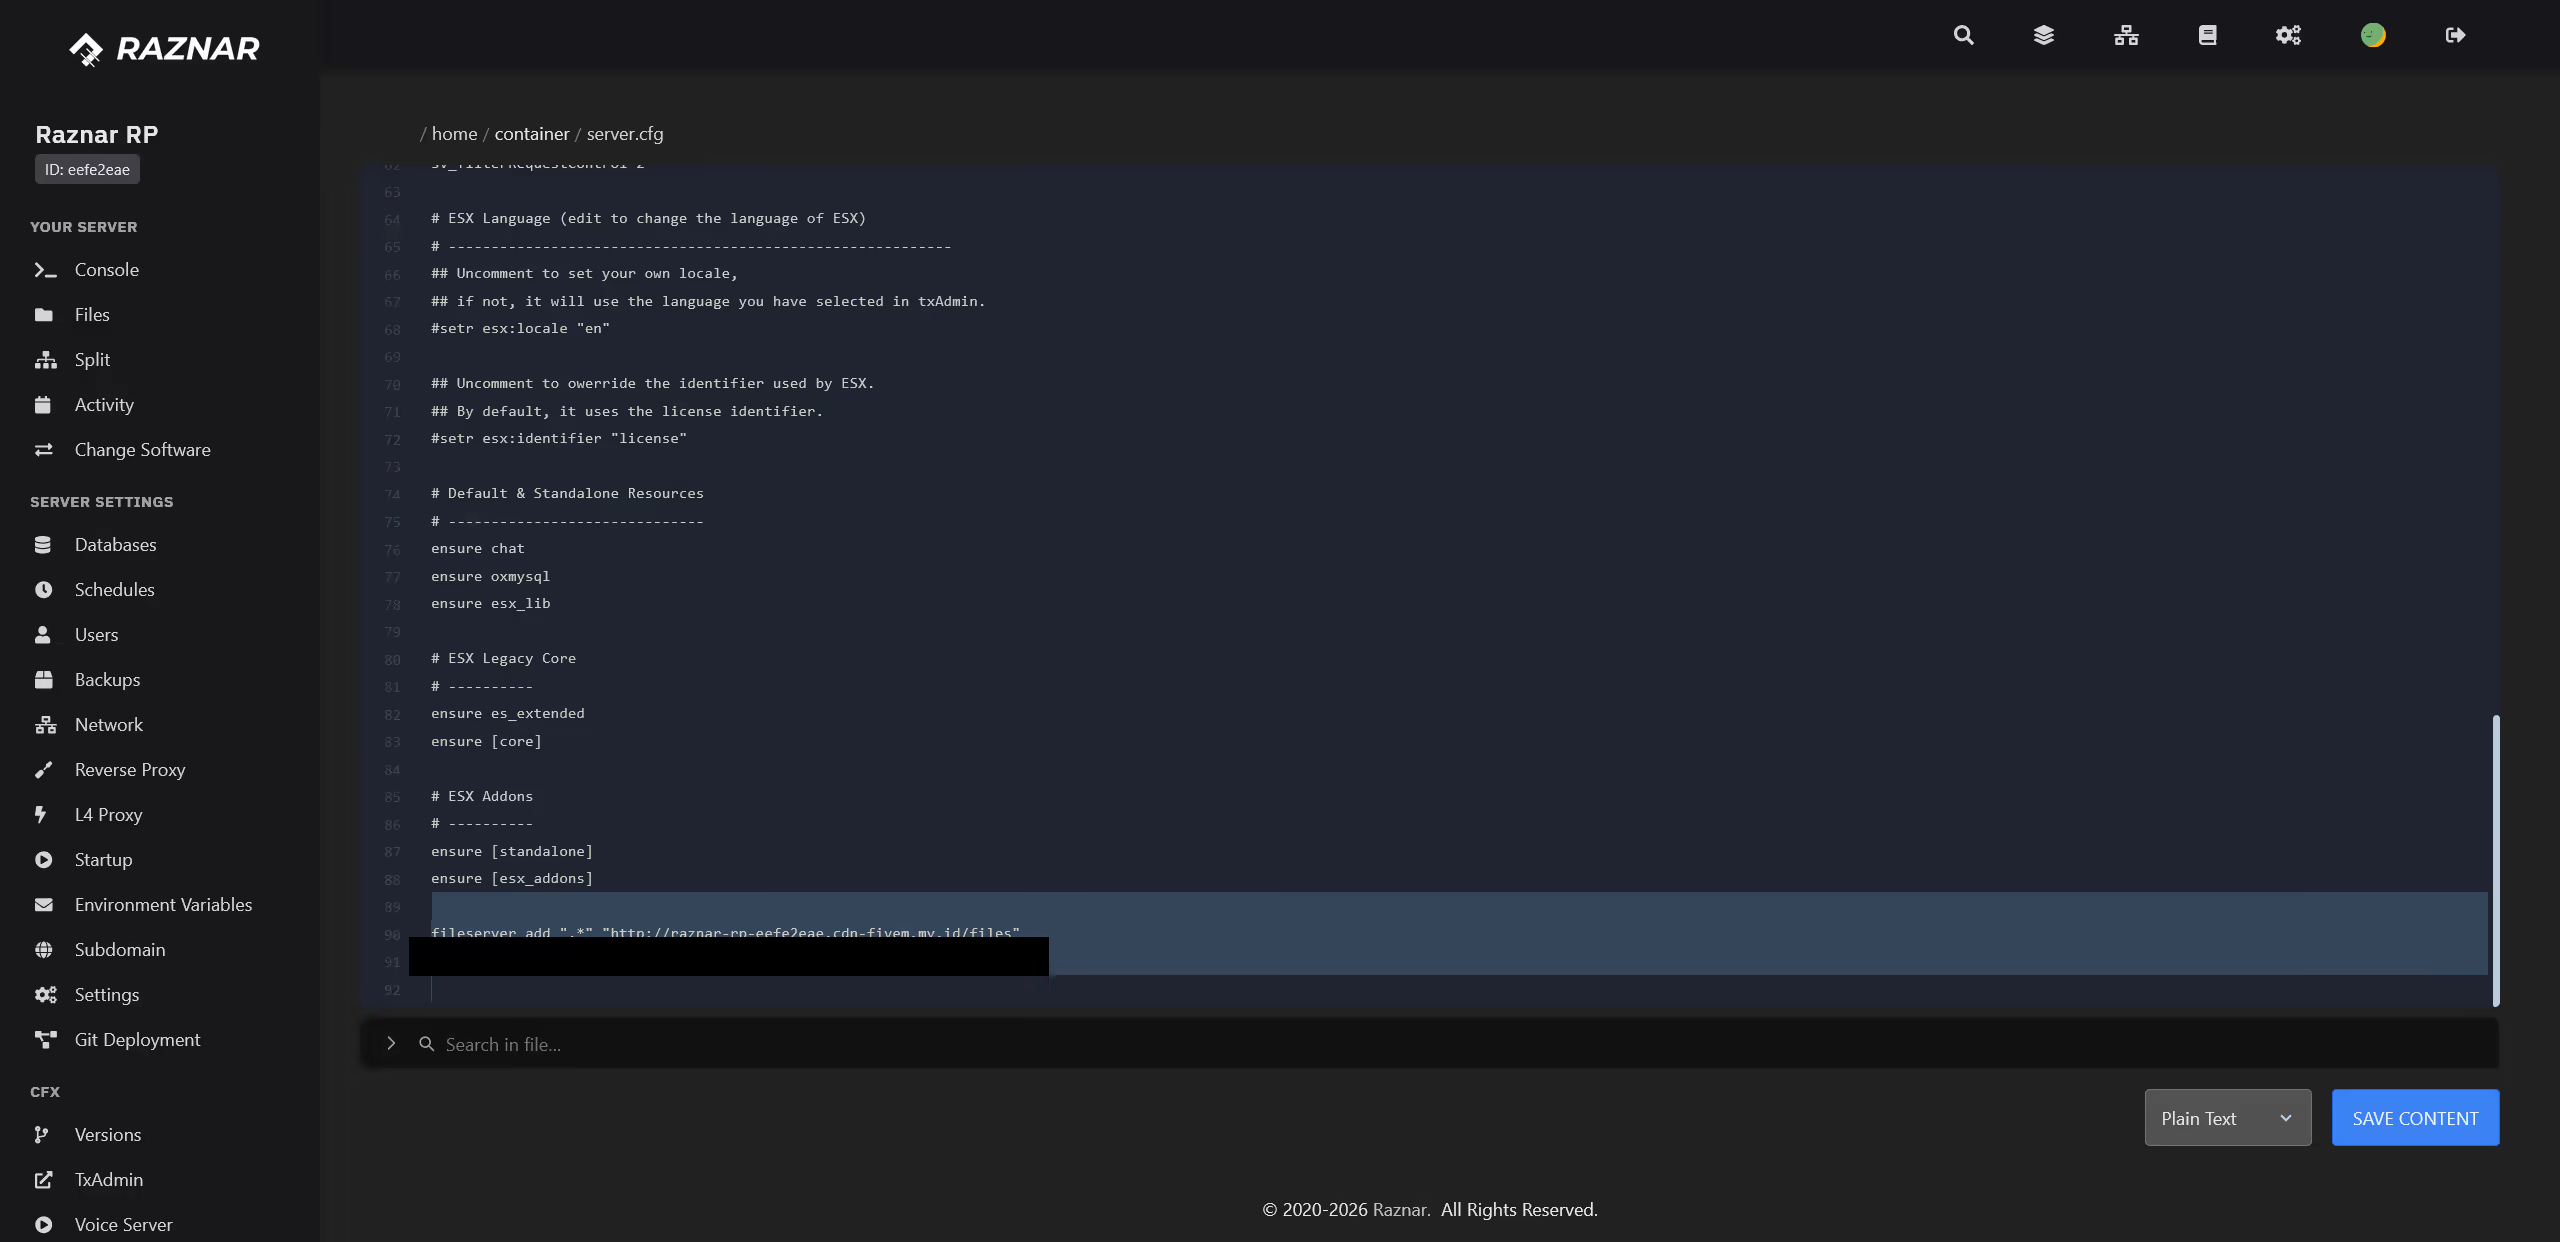
- Open the Files menu, then open
server.cfg. - Add the following two lines:
fileserver_add ".*" "http://myserver-a1b2c3d4.cache.raznar.id/files"
set adhesive_cdnKey "cdn_key_dari_panel"
🔧 Replace:
myserver-a1b2c3d4.cache.raznar.id→ your Cache Hostname. Don't remove the/filespart.cdn_key_dari_panel→ the CDN key shown in the Setup Guide.
- Click Save Content.
3. Restart the Server
Restart the server through the Console menu. Once active, resources will be downloaded by players through the proxy.
4. Clear Cache (If Needed)
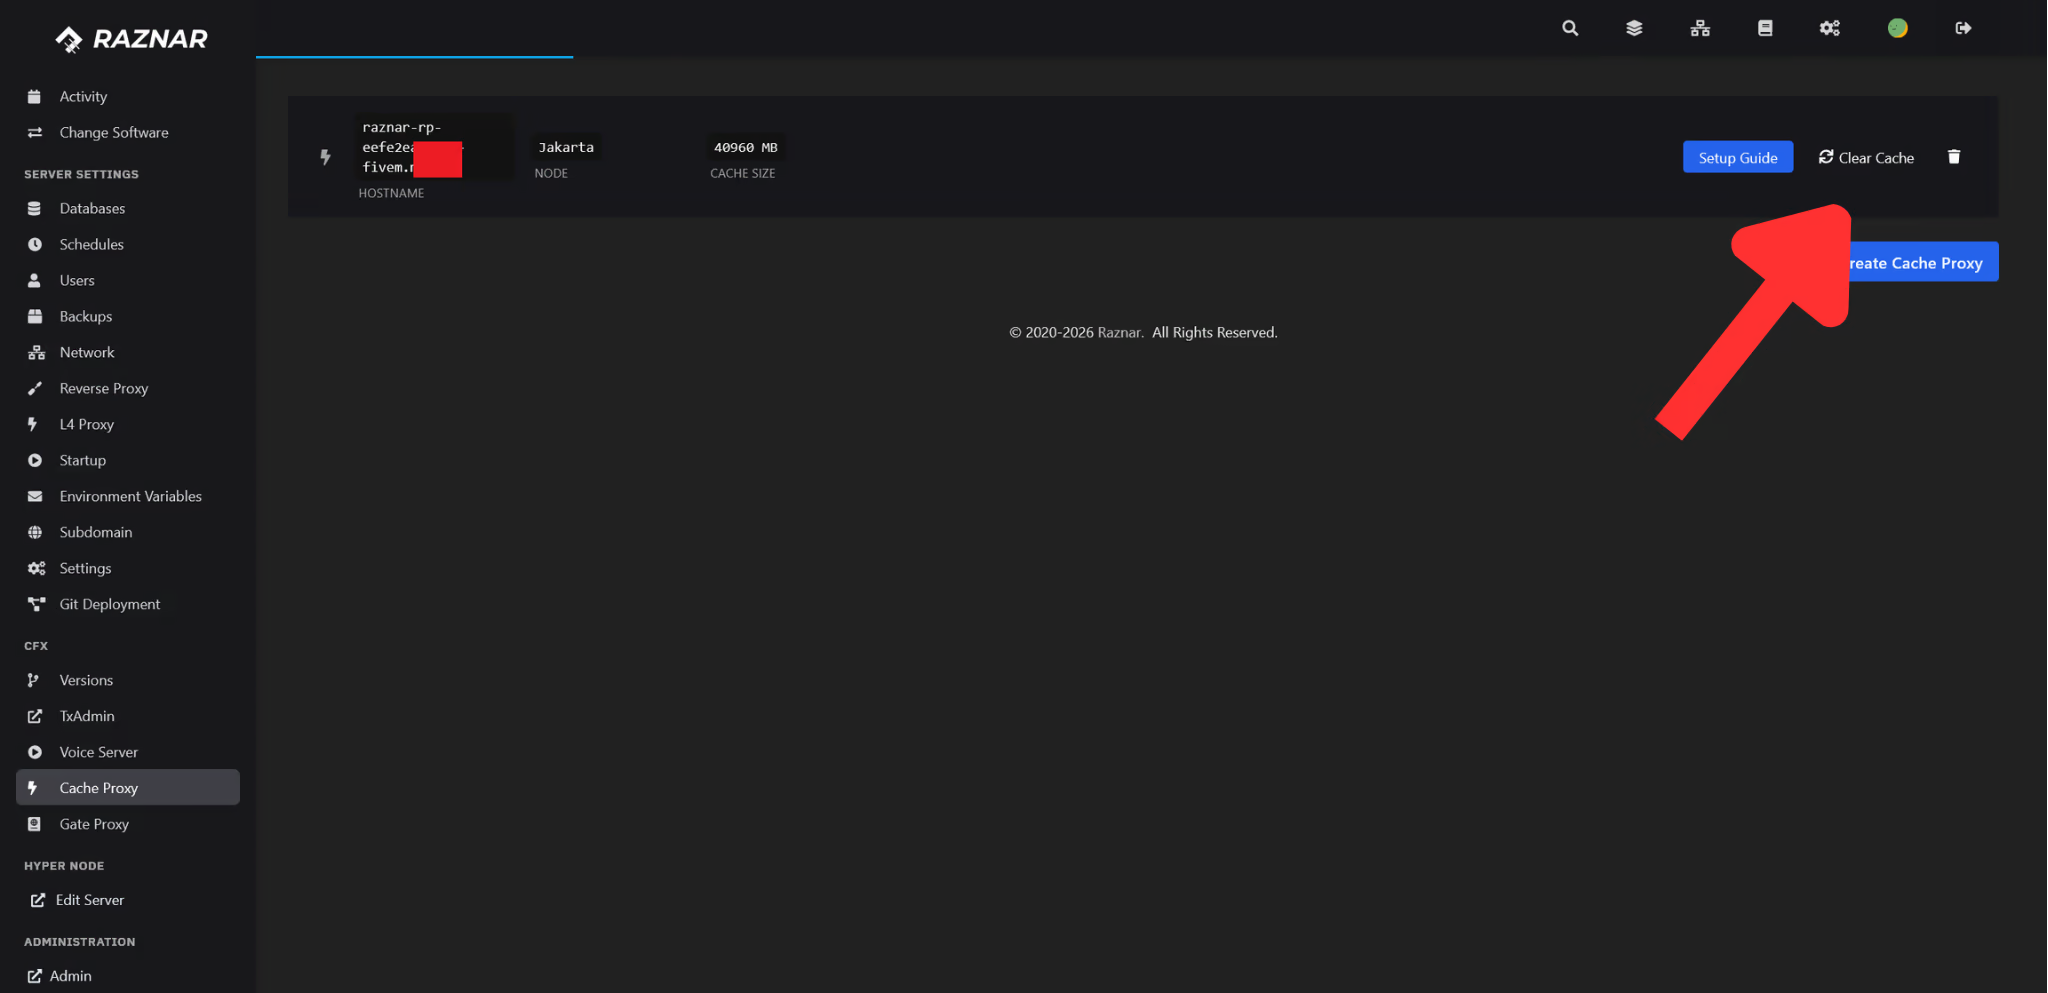
If a resource has been changed and players still receive the old version, open the CFX → Cache Proxy menu and click Clear Cache.
note
Always use the hostname that appears in your panel, don't copy the example above.