Creating a Server on a Hyper Node
Read Introduction to Hyper Node first so you understand what a Hyper Node is and how it works.
A game server at Raznar runs on a Hyper Node (also known as a Private Node), which is your own VPS with the Pterodactyl panel already installed.
A Hyper Node is created automatically when you subscribe. The install / provisioning process can take a few minutes.
1. Access the Hyper Node
- Log in to the Raznar billing website.
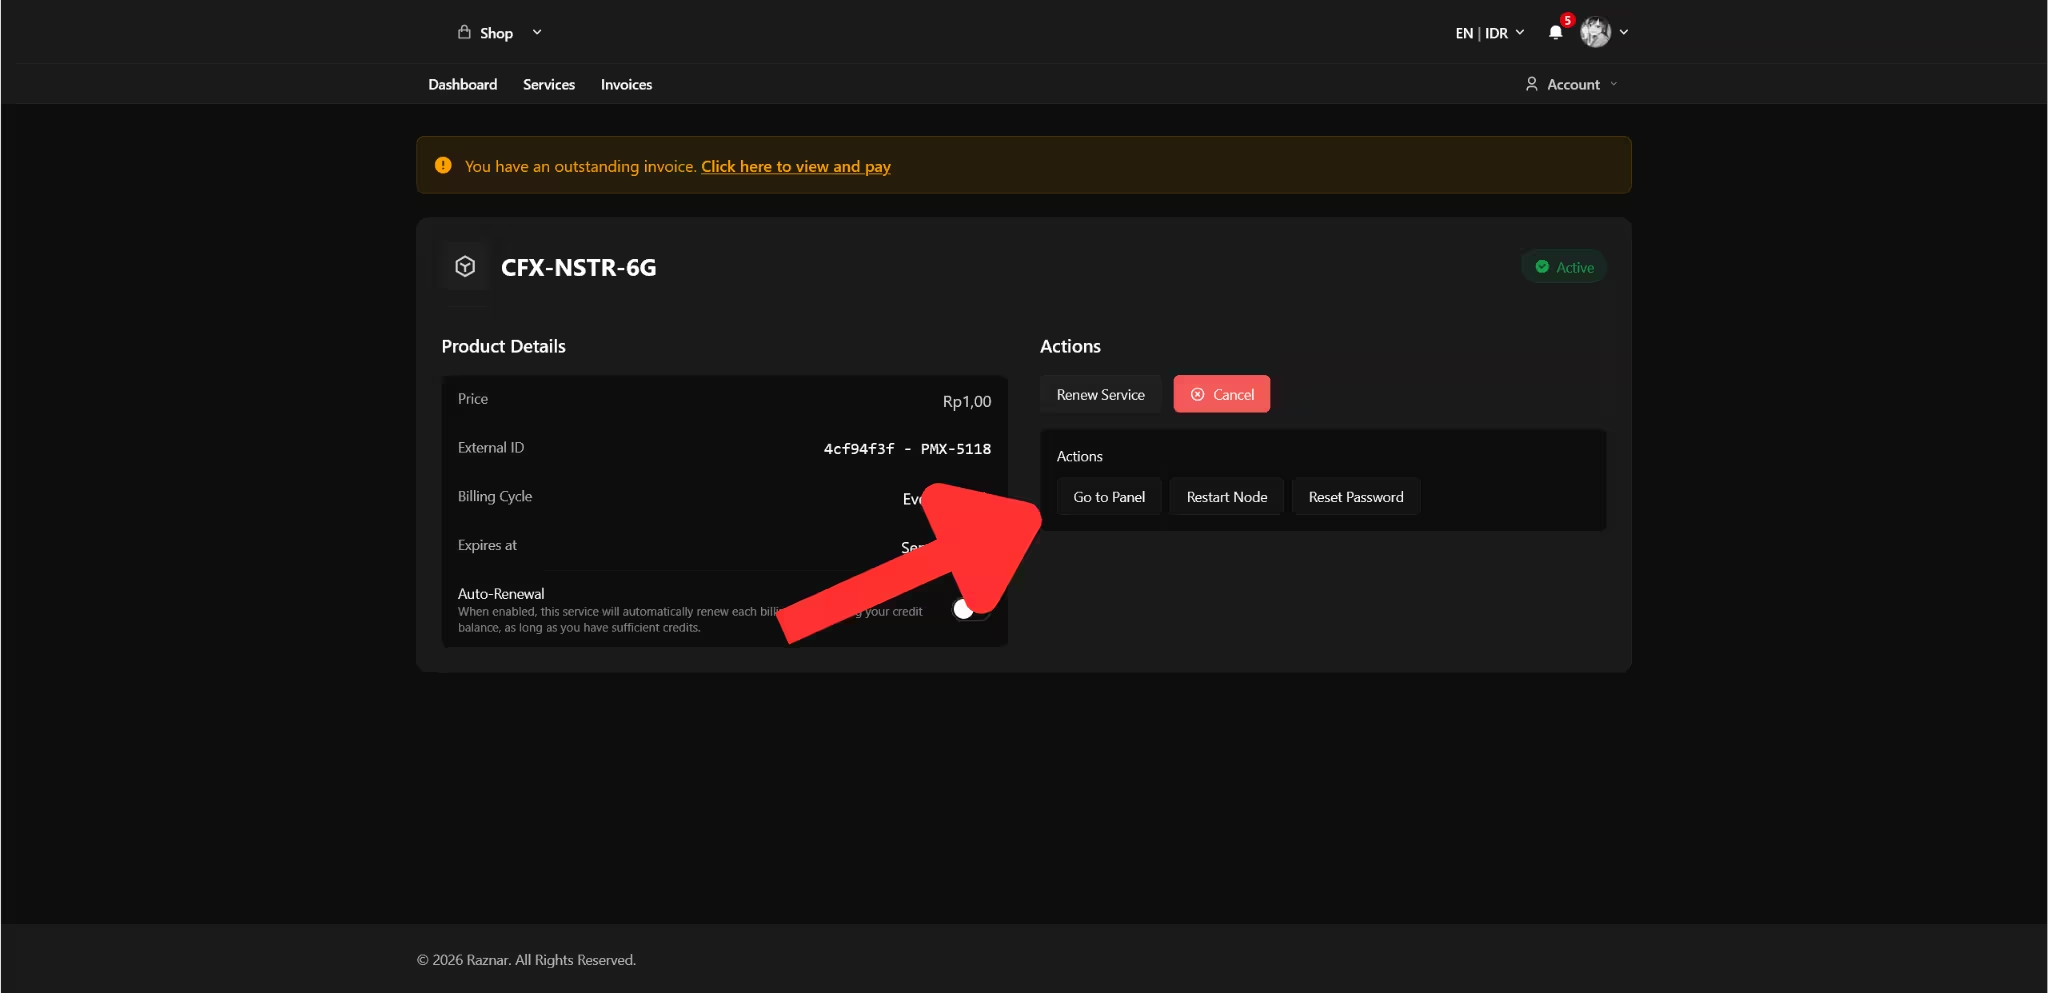
- Open the Services menu then select your Hyper Node service.
- Click the Go to Panel button. You will be logged in automatically (SSO) to the panel and taken directly to the Hyper Node page at the address
/hyper-nodes/{id}. - If you are not redirected automatically, open the panel manually and log in through the Nodes menu.
2. Make Sure the Hyper Node Is Installed
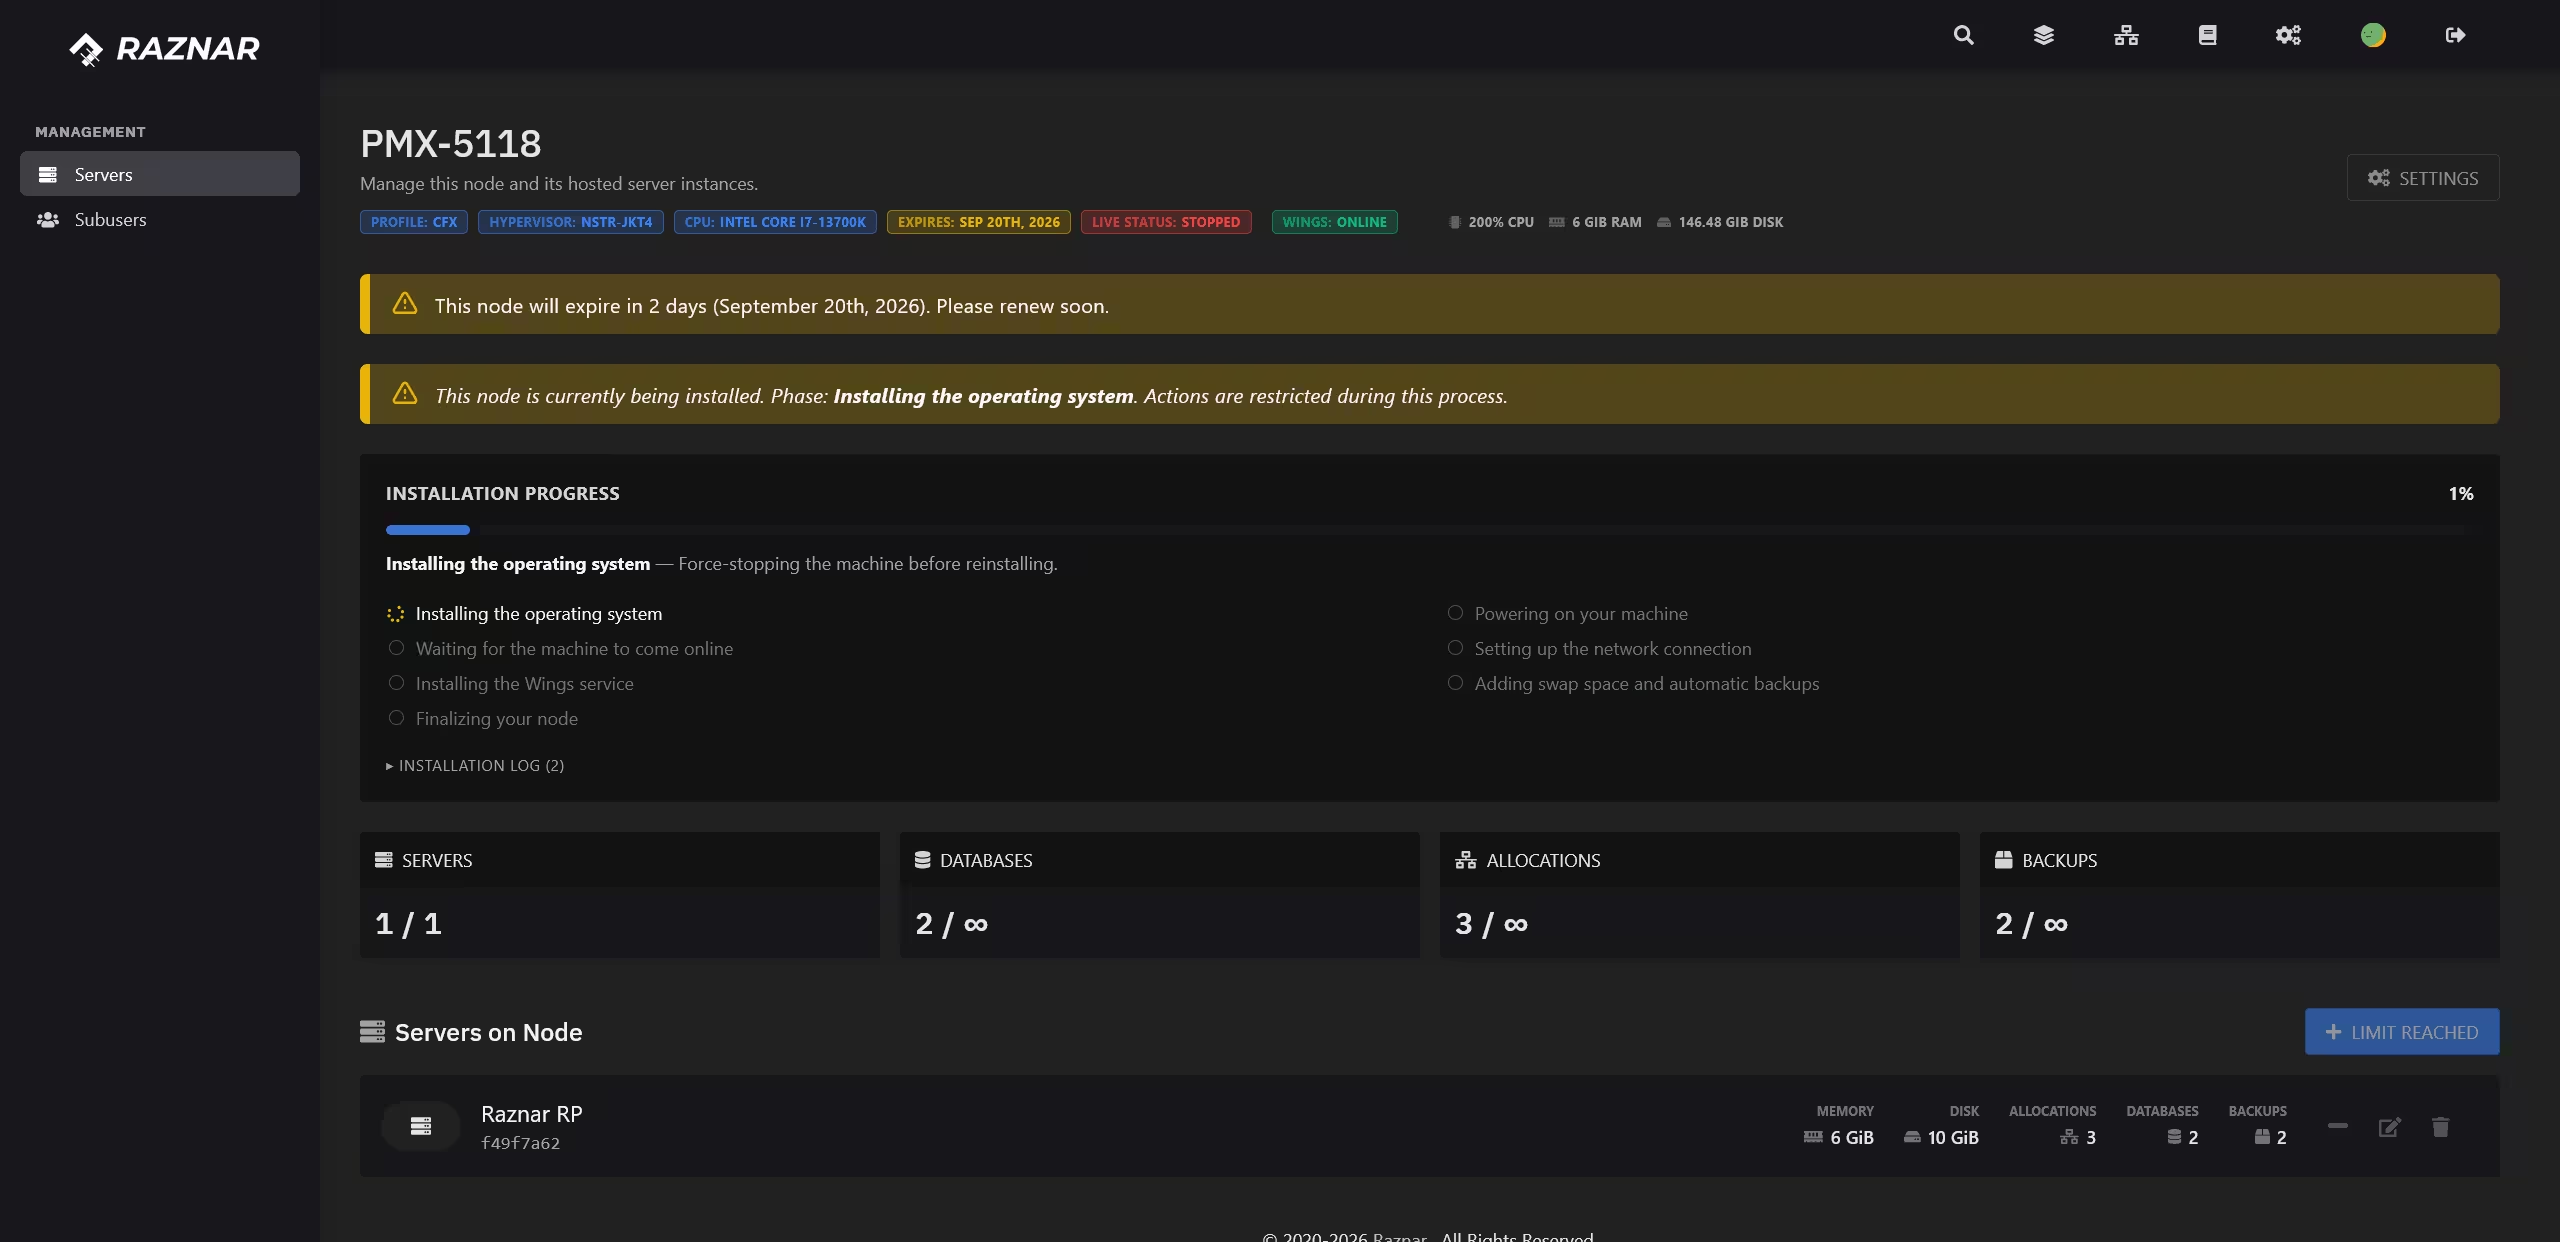
On the Hyper Node page (/hyper-nodes/{id}) in the panel, check the install / provisioning status:
- Pending / Installing → wait until the install process finishes, then reload the page.
- Active → the Hyper Node is ready to use.
- If the status does not change for a long time, contact the Technician / Hosting Admin via a ticket.
3. Get to Know the Hyper Node Page
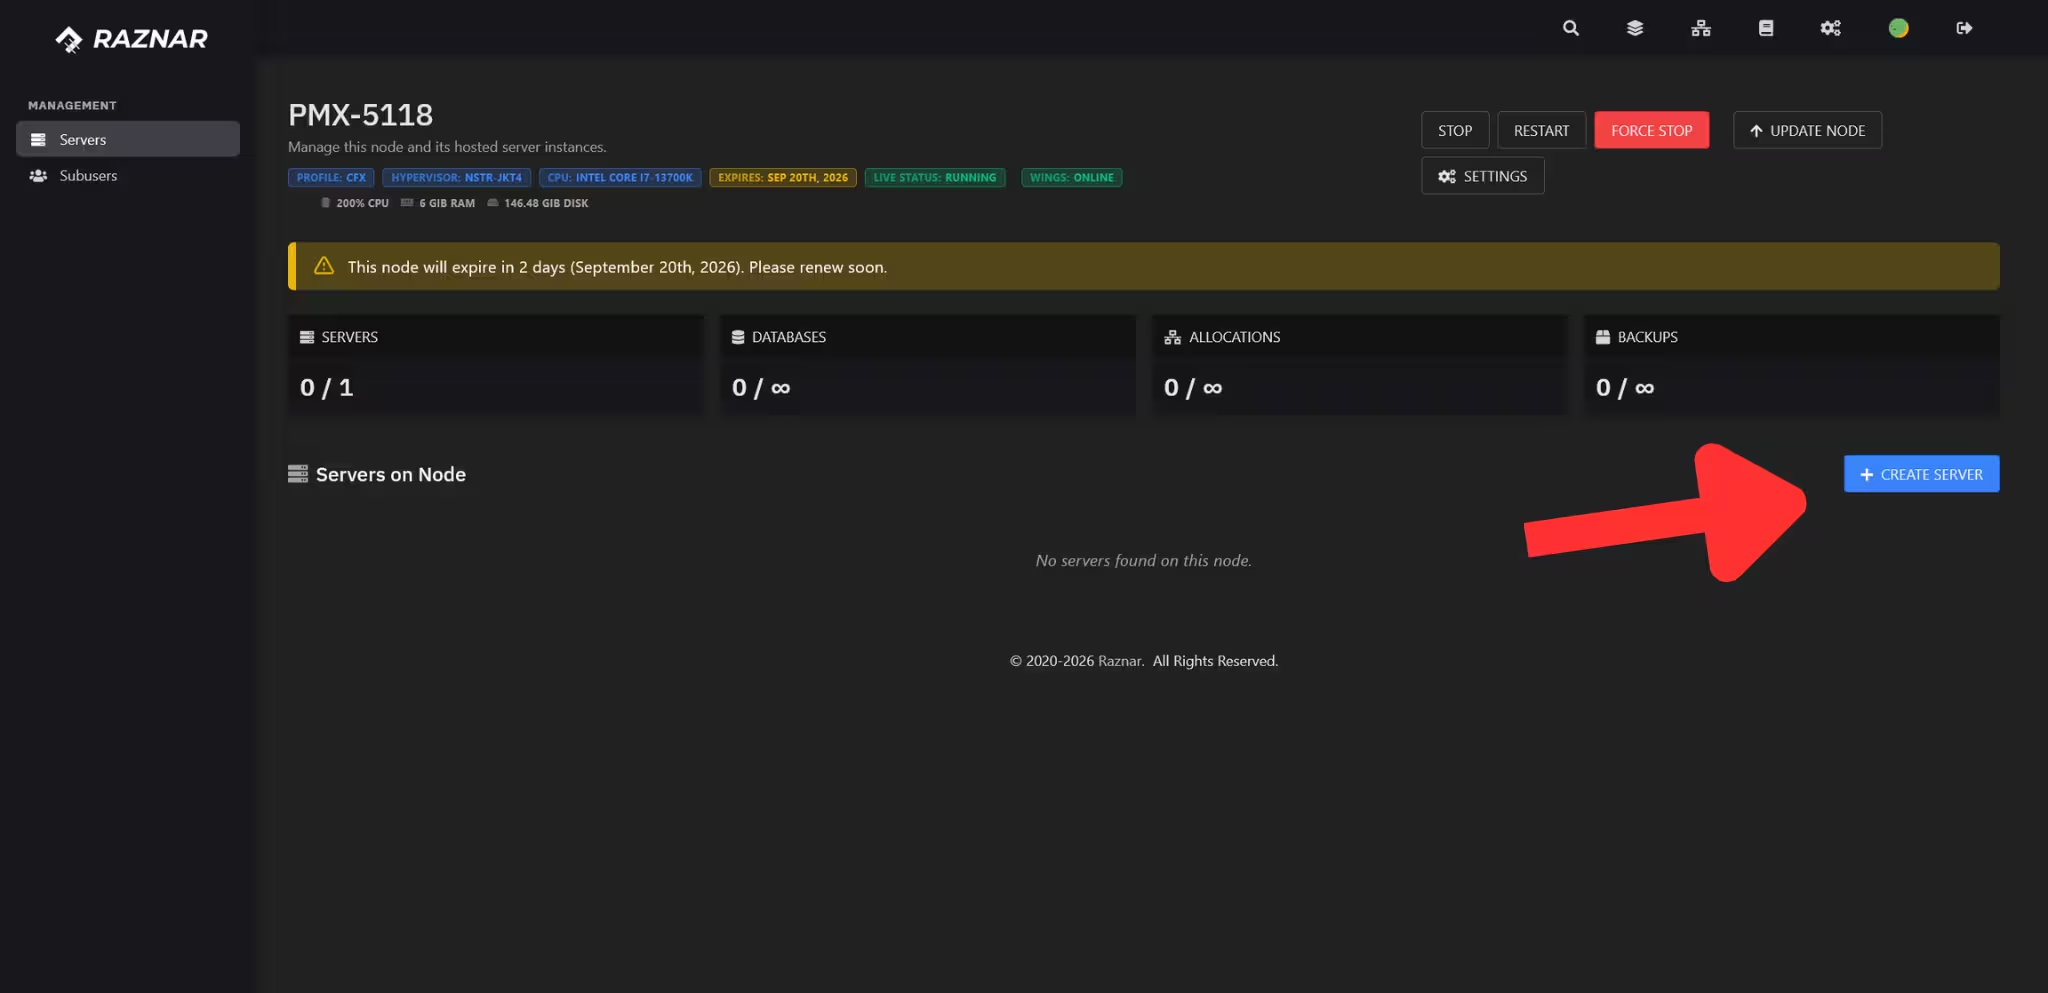
On the Hyper Node page, the left sidebar contains the Management group:
- Servers → the list of servers running on this node.
- Subusers → manage other people's access to this node.
To create a new server, click the Create Server / New Server button.
4. Create a Game Server
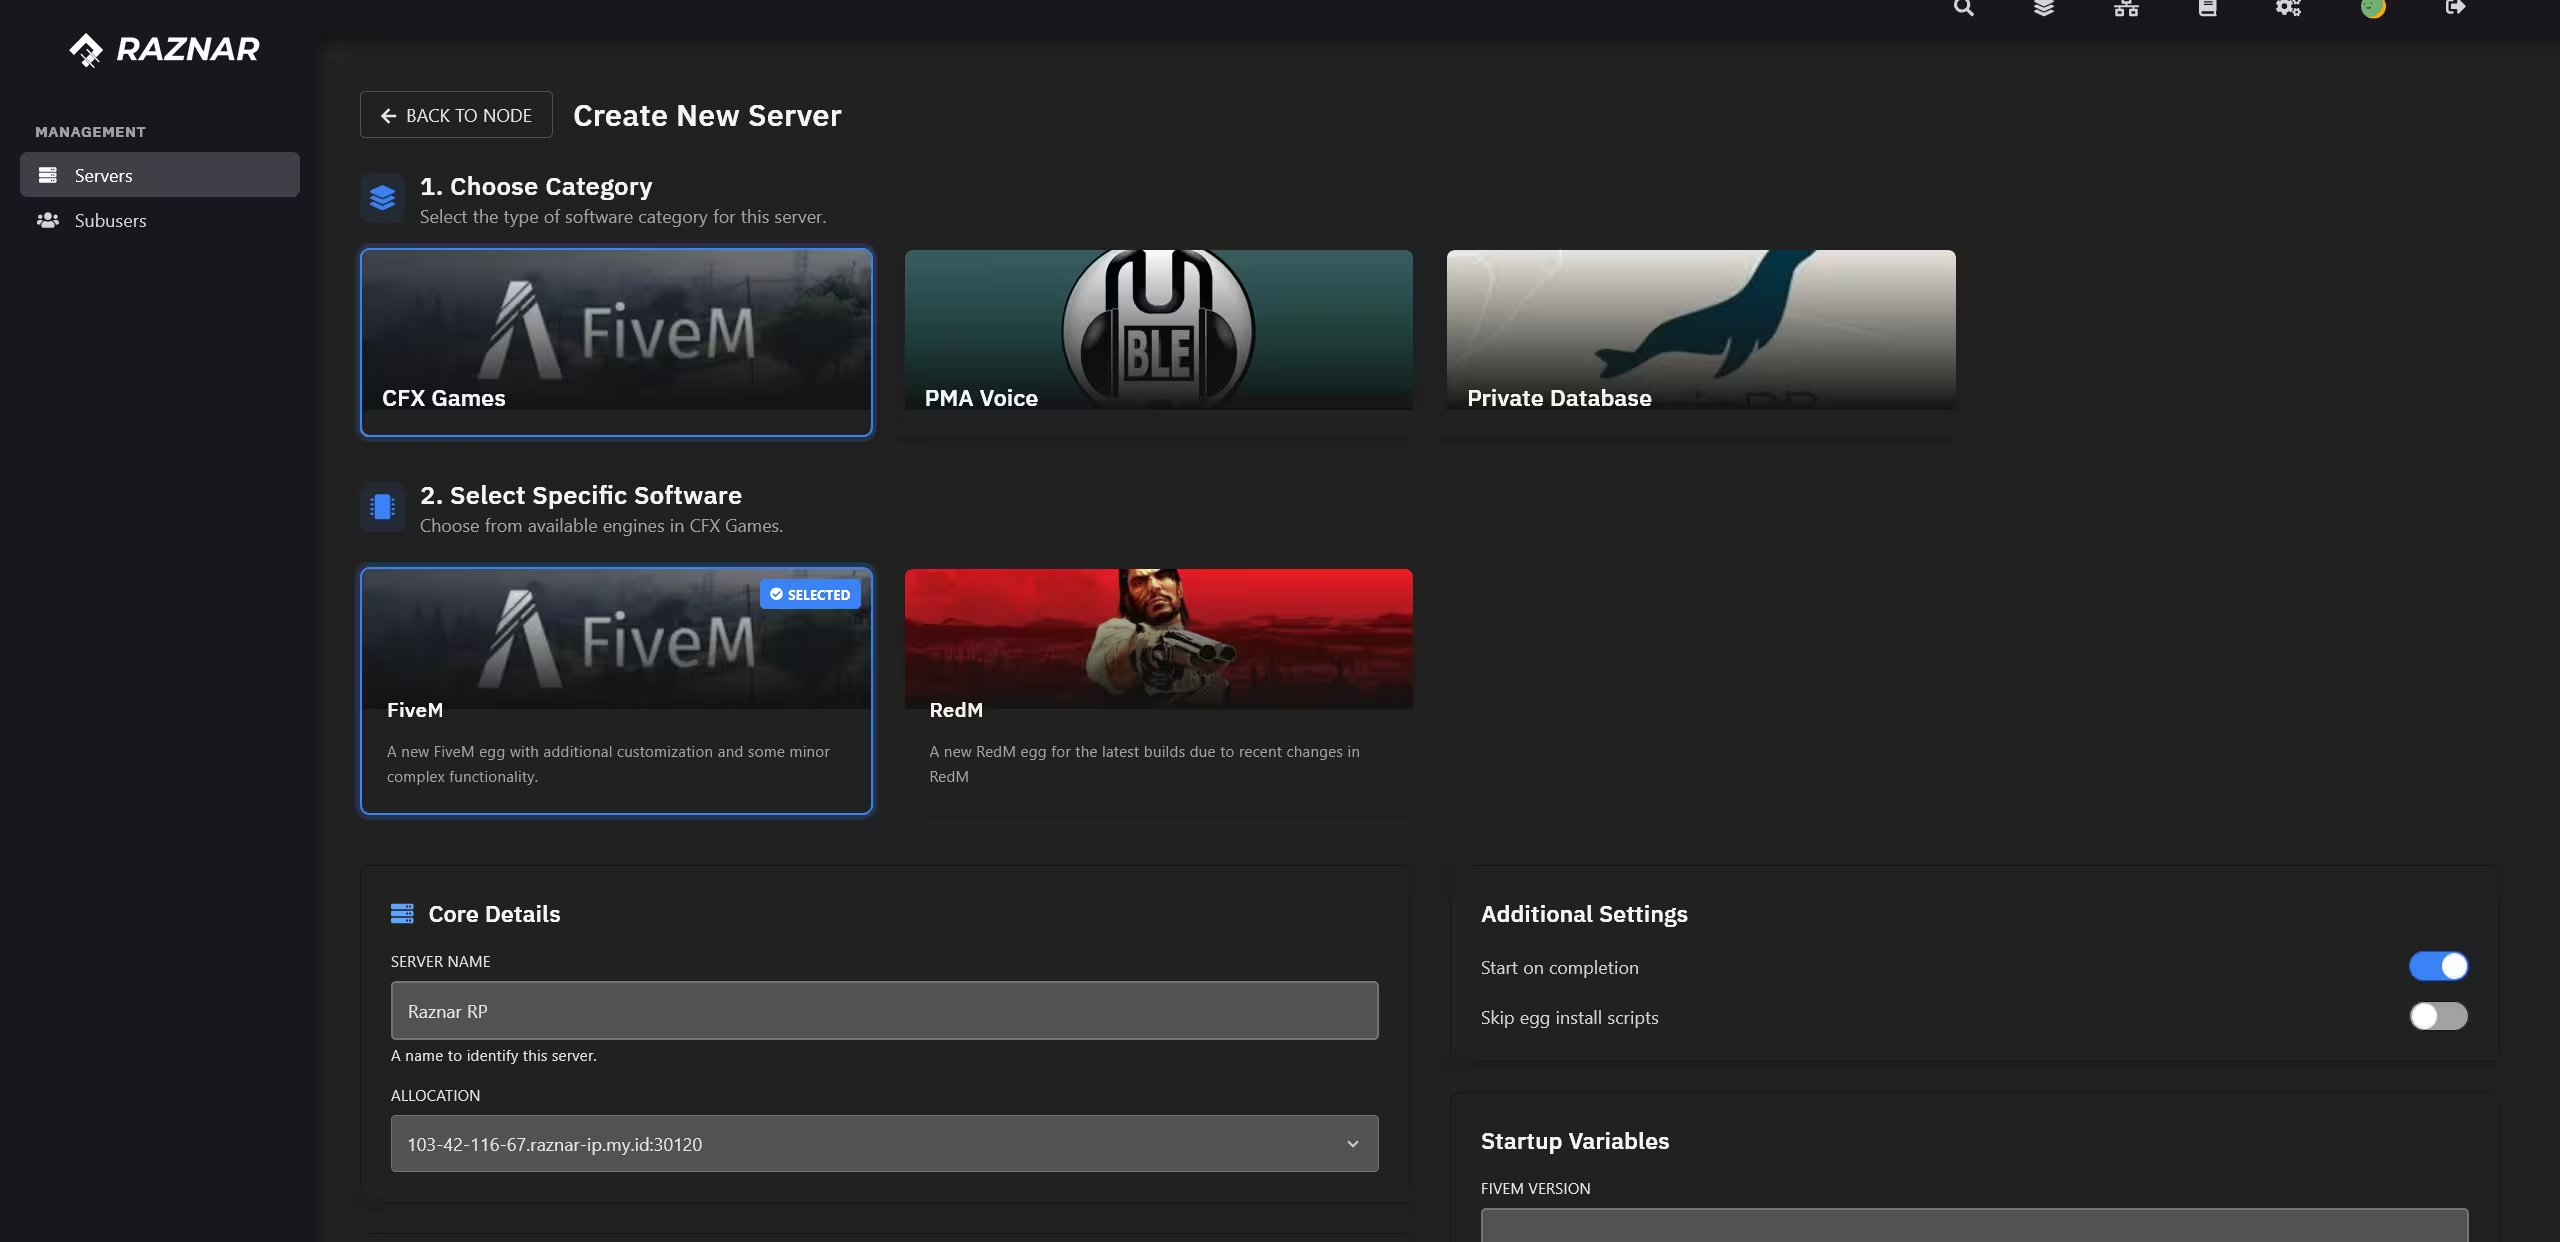
Fill in the Create Server form starting from the top:
- Choose Category → select the category (nest) for the game you want, for example FiveM.
- Software / Engine → select the egg available for that game (for example
FiveM/FXServer). - Core Details → fill in the Server Name and select the Allocation (IP:port) the server will use.
- Additional Settings → enable Start on completion if you want the server to start right after it is created.
Each game uses a different port. Examples:
- FiveM →
30120 - Minecraft Java →
25565 - Minecraft Bedrock →
19132
5. Install, Resource Limits & Startup Variables
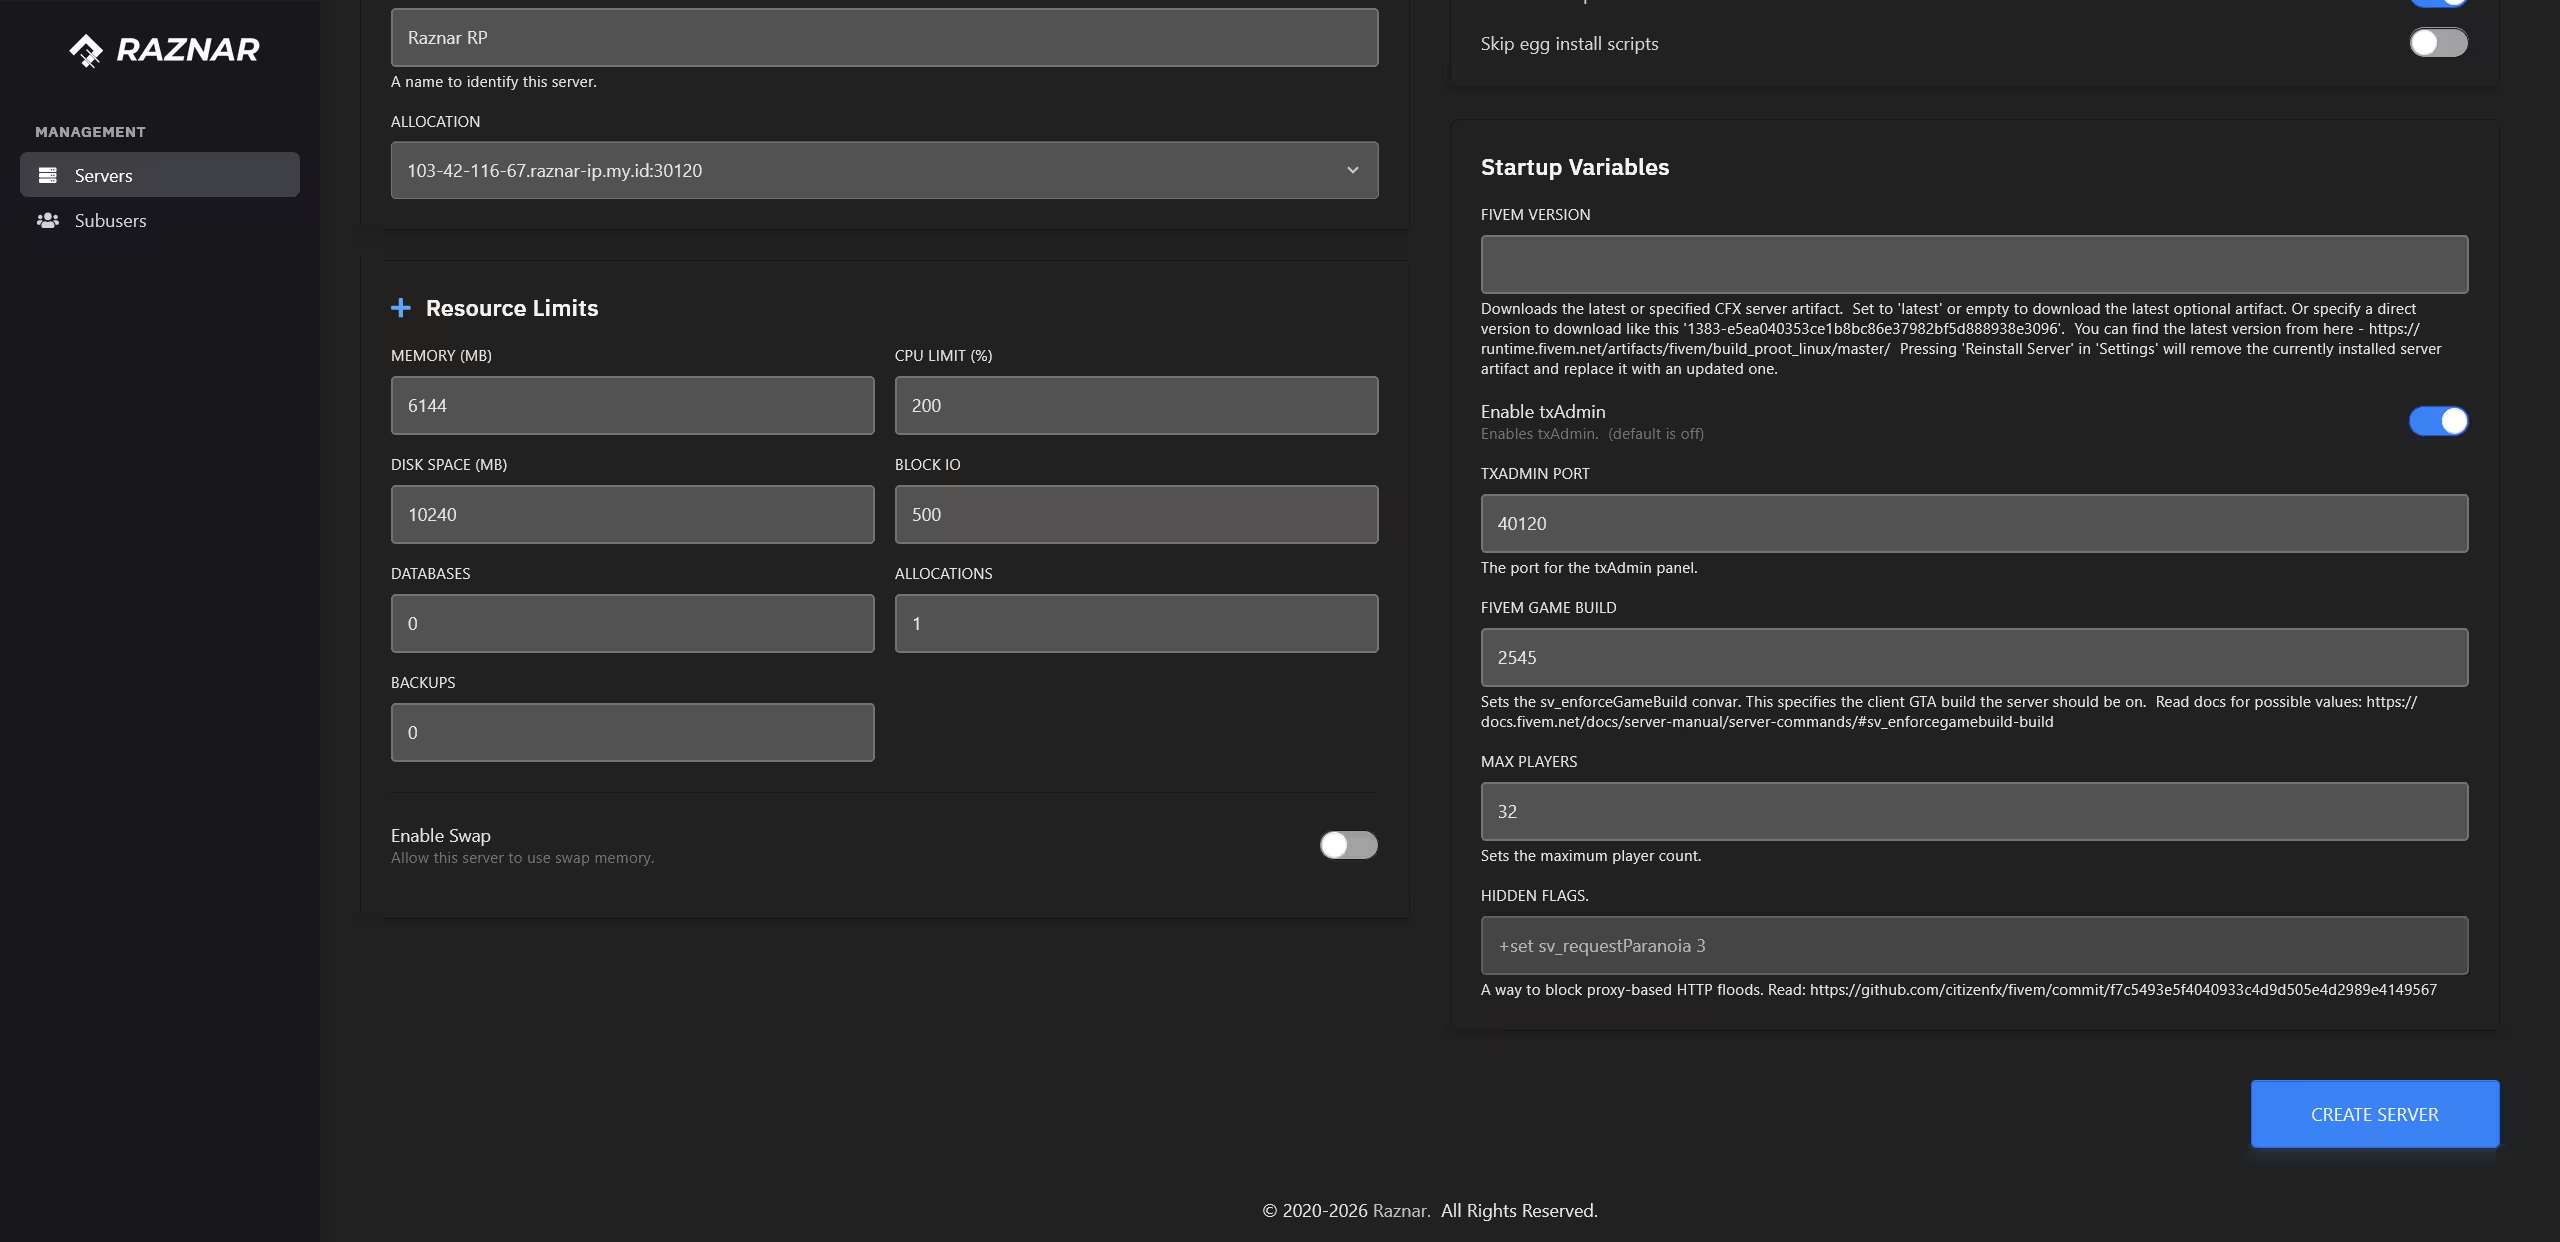
- Resource Limits → set Memory (MB), CPU Limit (%), Disk Space (MB), Block IO, and the Databases, Allocations, and Backups limits. Enable Enable Swap if the server needs swap memory, then fill in Swap Limit (MB).
- Install → enable Skip egg install scripts if you do not want to run the egg's install script when the server is first created.
- Startup Variables → fill in the variables the game needs, such as the FiveM license key if requested.
- Click Create Server to finish creating the server.
Set the Allocations limit to at least 3 and the Databases limit to at least 1 so the server has enough ports and databases. For FiveM, you must have 2 allocations (the game port 30120 and the txAdmin port 40120).
6. Next
The server has been created and appears in the Servers list. Further configuration depends on the game you use.
If you created a FiveM server, continue to New Server Setup to:
- Ensure the game port is
30120. - Prepare the txAdmin port
40120. - Fill in the license key in the Startup menu.