How to Use the Import Server Feature
The Import Server feature lets you download files and folders directly from an external server (for example, your old hosting) to your current server using an SFTP connection.
This is a very useful tool for migration, letting you move your server data WITHOUT having to download it to your personal computer first.
Step 1: Preparation on the Old Server or Hosting
This step is very important to make sure the import process runs quickly and efficiently.
- Open the File Manager in your old server's panel.
- Select All the files then click to archive all of them.
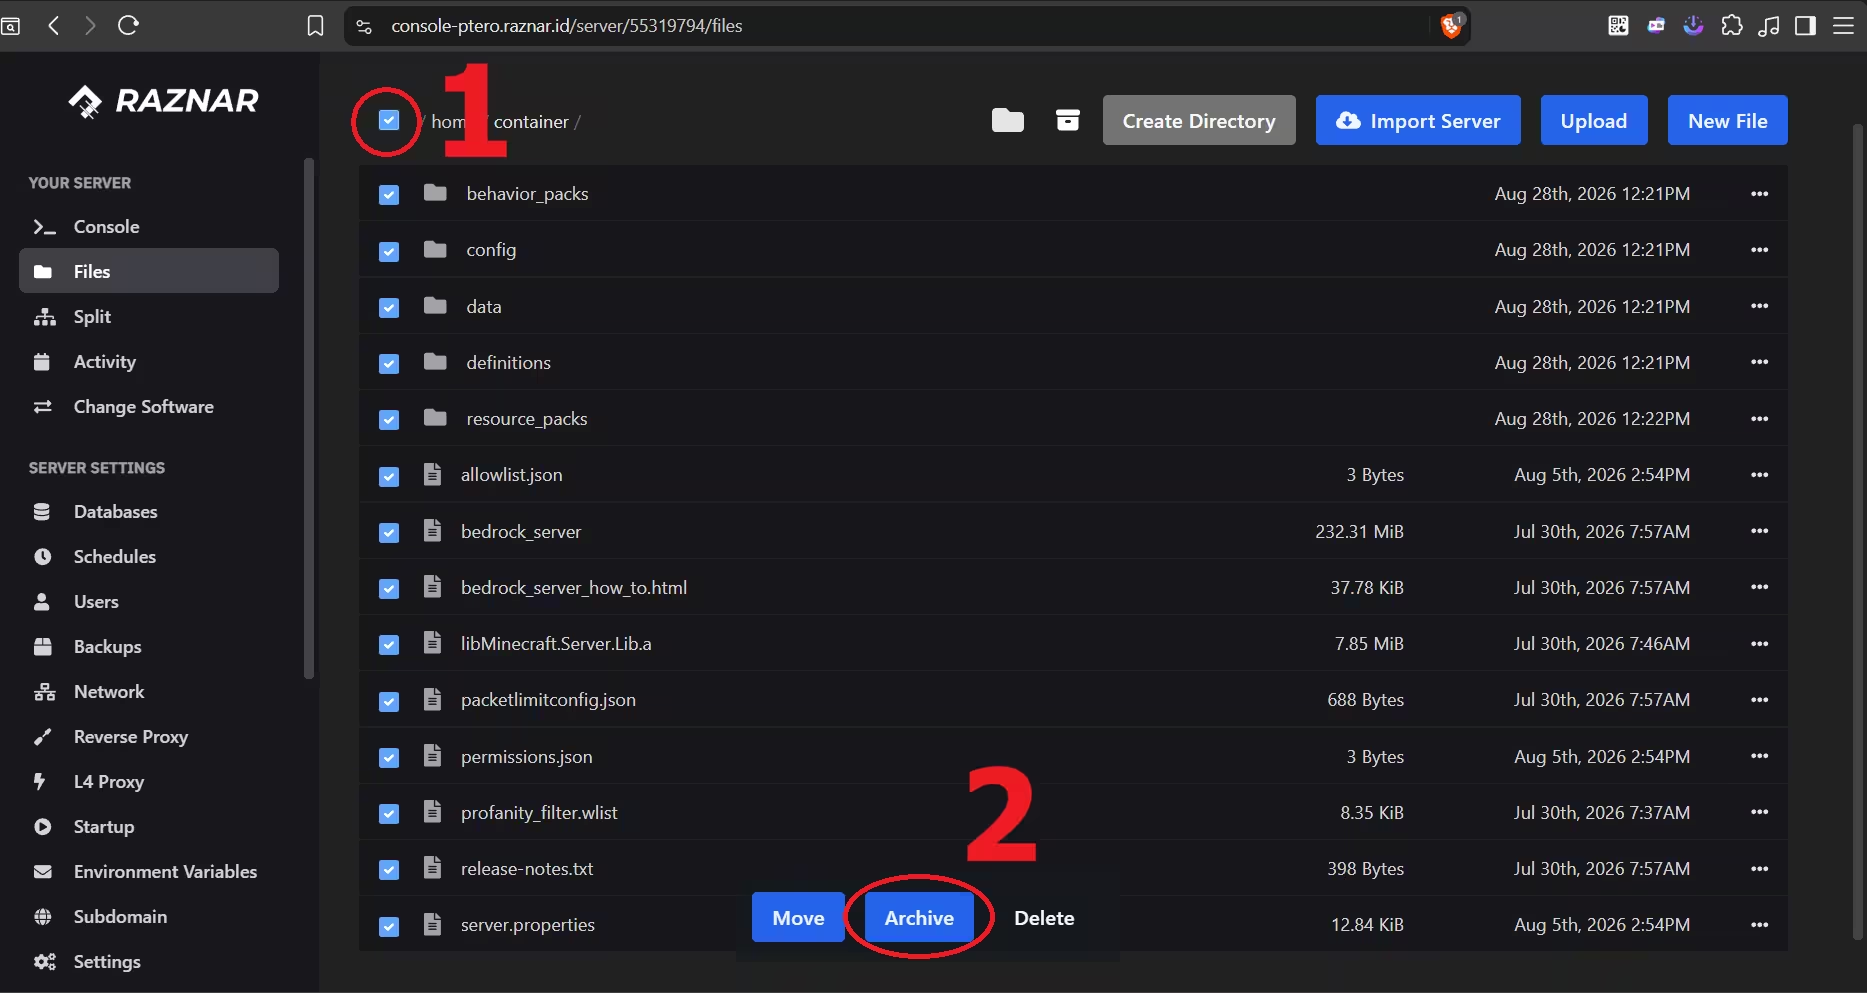
- Rename the archive file to something shorter (Example =
MyBackup.tar.gz).

Your old server is now ready
Step 2: Open the Import Server Option in the Raznar Panel
Now, switch to your new panel (the destination server).
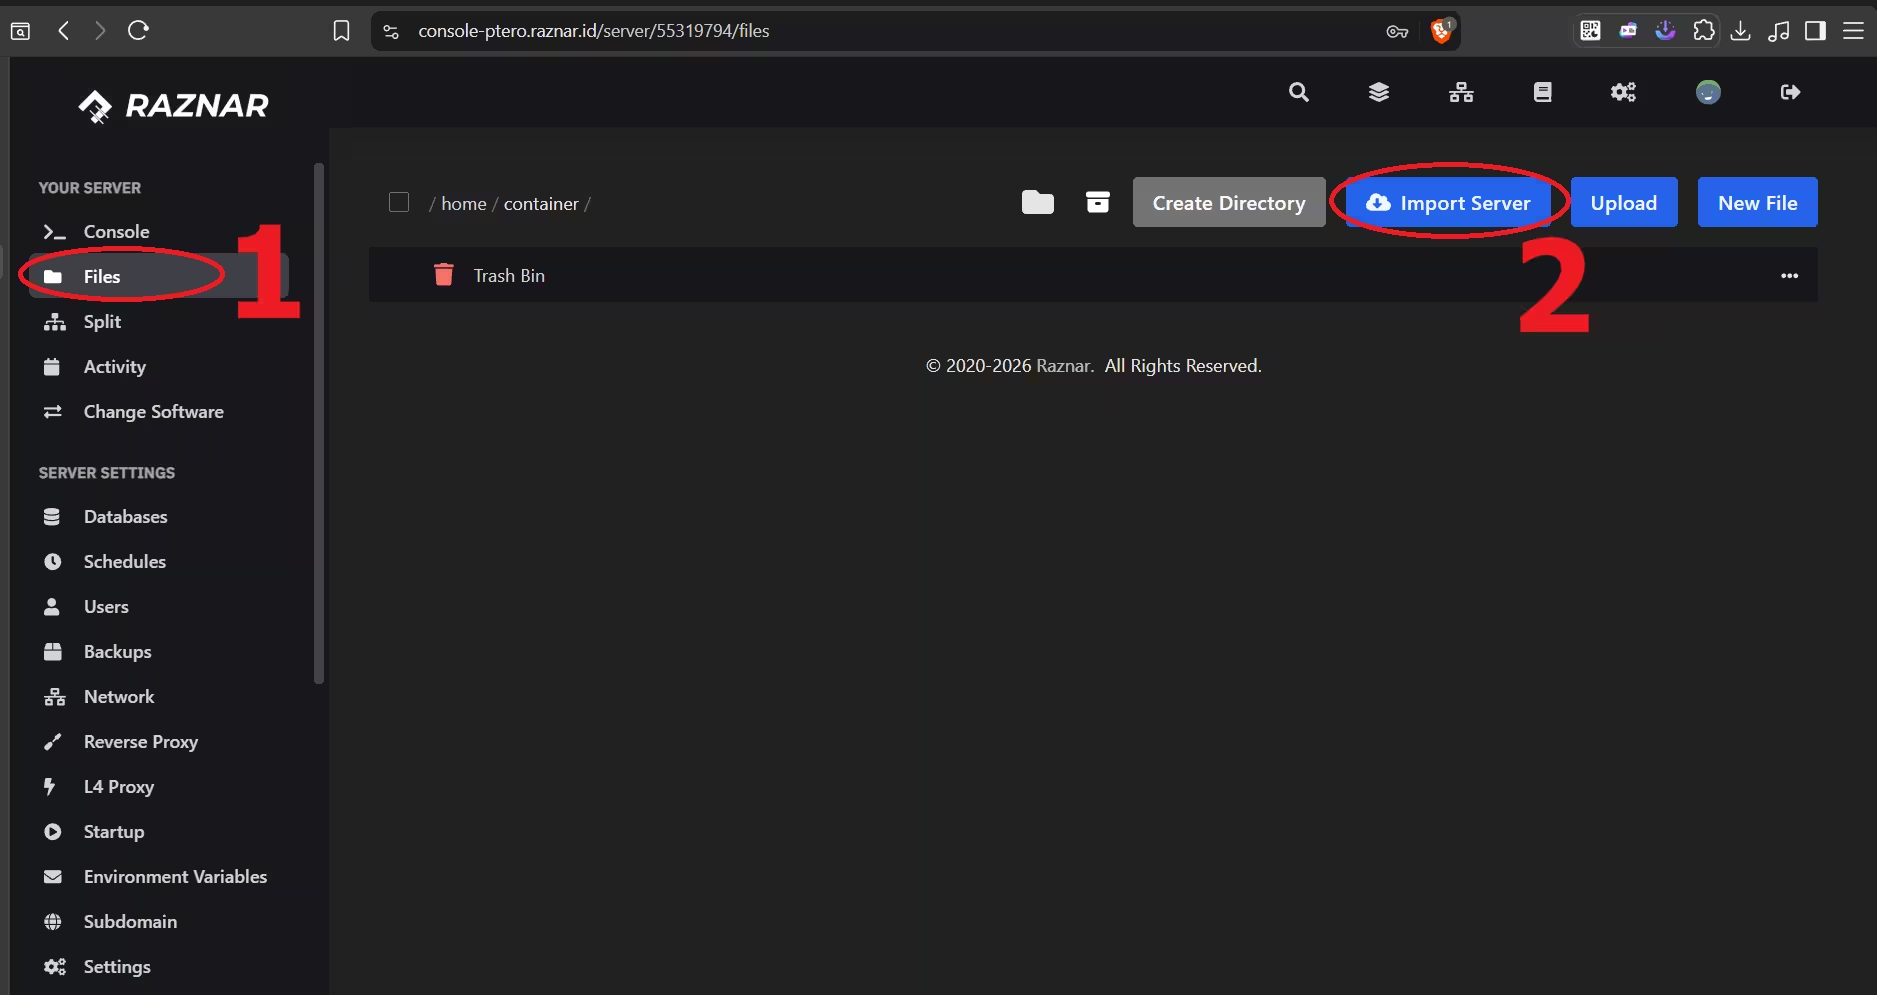
- Open the Files tab.
- Click the Import Server button located at the top of the file manager.
Step 3: Fill In the Old Server's SFTP Data into the New (Raznar) Server
Open your old hosting server then check the Settings or SFTP Details section. There you will find the Server Address, Port, and Username. You can copy them and paste them into the new (Raznar) hosting's import server.
EXAMPLE
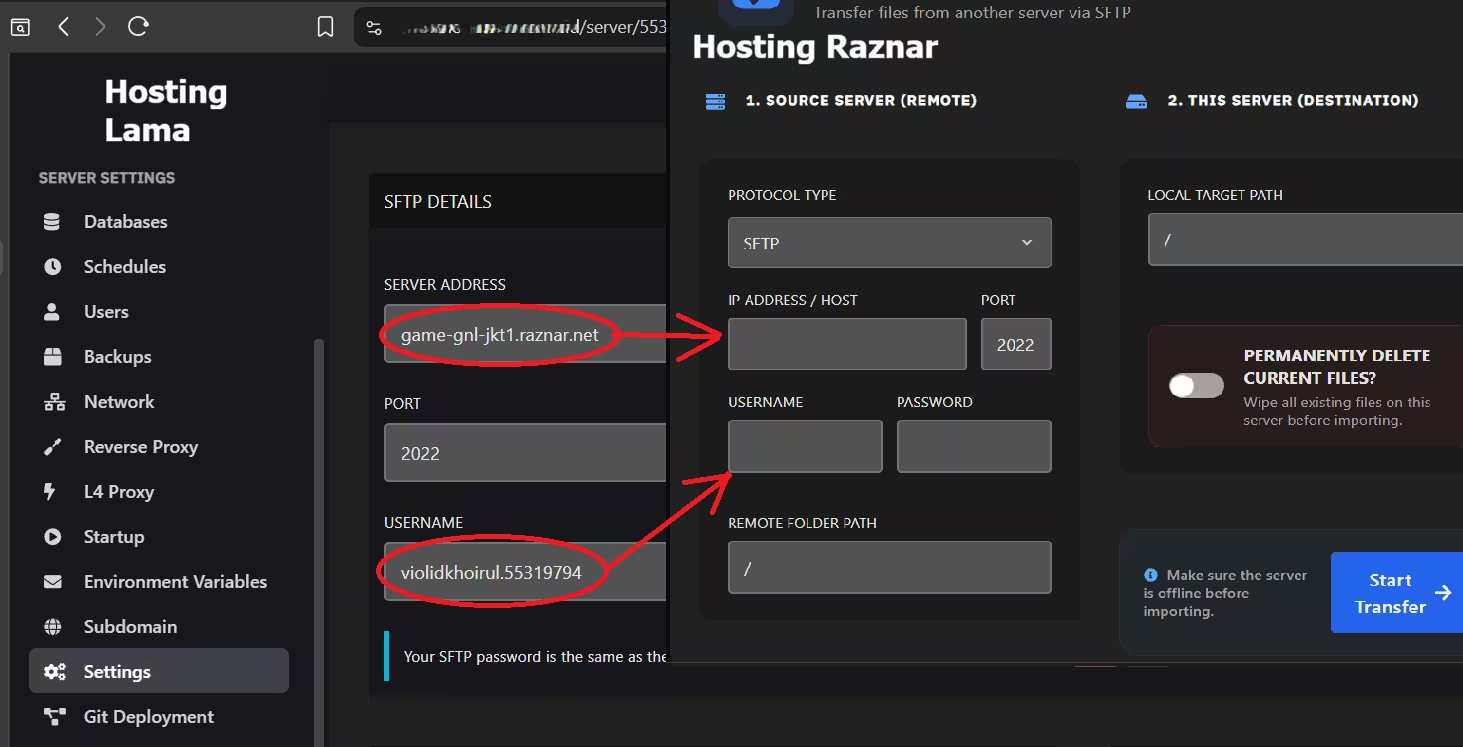
- SERVER PROTOCOL: Leave it as
SFTP. - USER: The SFTP username from your old server.
- PASSWORD: The panel password from your old server.
- SERVER IP: The IP address or hostname of your old server.
- SERVER PORT: The SFTP port of the old server. The default port is usually
22or2022.
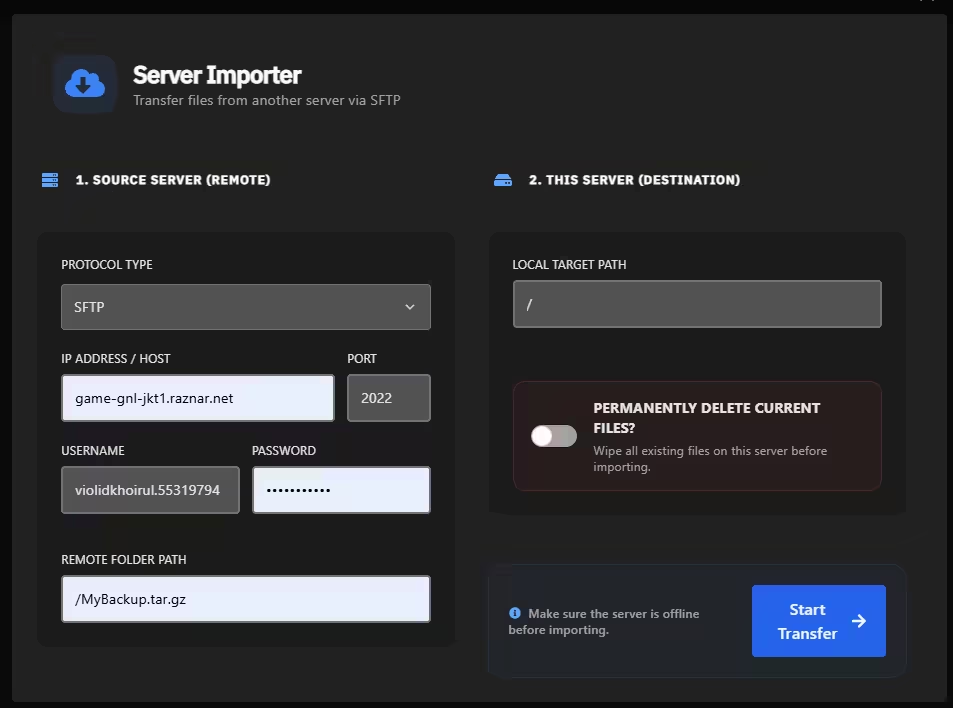
It will then look like this,
EXAMPLE:
-
REMOTE FOLDER PATH: This is the path on the old server that contains your archive file.
- Based on Step 1, we placed the backup or archived file in the root folder with the backup name
MyBackup.tar.gz, so fill this in with the file name.
- Based on Step 1, we placed the backup or archived file in the root folder with the backup name
-
LOCAL TARGET PATH: This is the path on the new server where the file will be downloaded.
- You can import it straight to the main directory (root) by filling in
/.
- You can import it straight to the main directory (root) by filling in
At the bottom of the modal, there is an option that reads "PERMANENTLY DELETE ALL SERVER FILES (EXCLUDING SFTP FILES)?".
DO NOT ENABLE THIS OPTION unless you are absolutely sure you want to delete all files on your current server before the import begins. For most migration cases, leave this option off (disabled).
Step 5: Start the Import Process
- Double-check all the details.
- Click the Import from SFTP button.
The panel will start the download process in the background. The time required depends on the size of your archive file and the connection speed between the two servers.
Step 6: Extract Your Files
Once the import process is complete:
- Go back to your File Manager.
- You will now see your archive file (for example,
MyBackup.tar.gz) in the main directory. - Right-click the archive file and select Decompress or Unarchive to extract your files.
After extraction, you can move the files and folders to where they should be, and your migration is complete!